How to create a connection with the Shopify platform?
Step 1: Creating a Shopify connection in Sembot (workspace)
Instructions: Before you begin, log in to your Shopify store. If you have more than one domain, go to the domain from which you want to import products into Sembot.
- Log in to app.sembot.com and open your project.
- Click your avatar in the top right corner of the navigation bar.
- Go to Workspace Settings, then to Connections.
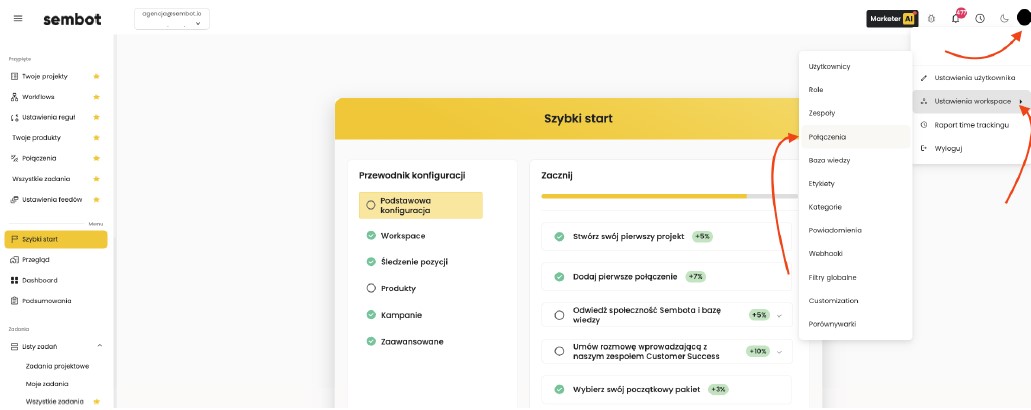
- Then select the Shopify integration.
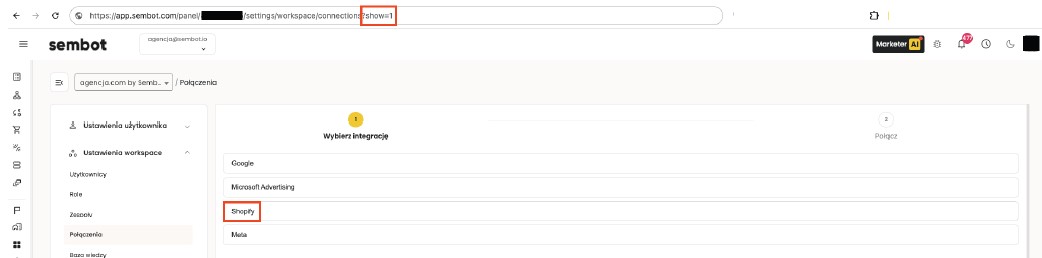
- A Connect button will appear on the right side.

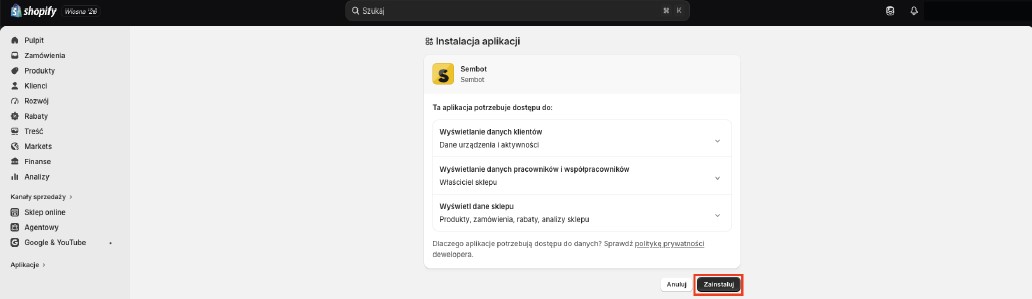
- Click Log in with Shopify. You will be redirected to our app in your Shopify store.

- Click Install. After installation, you will be redirected back to the Sembot panel and your Shopify store will be successfully connected to your workspace in Sembot.
Step 2: Adding the Shopify Connection to your project.
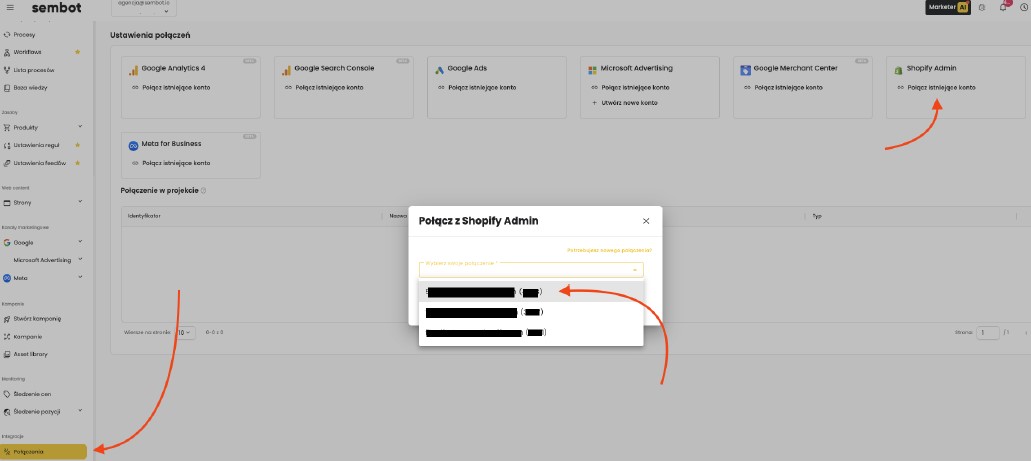
- In Sembot, go to the Connections section in the left menu.
- In the Shopify Admin panel, click Connect existing account.
- Select the connection and click Connect.
Step 3: Adding a Product Feed in Sembot
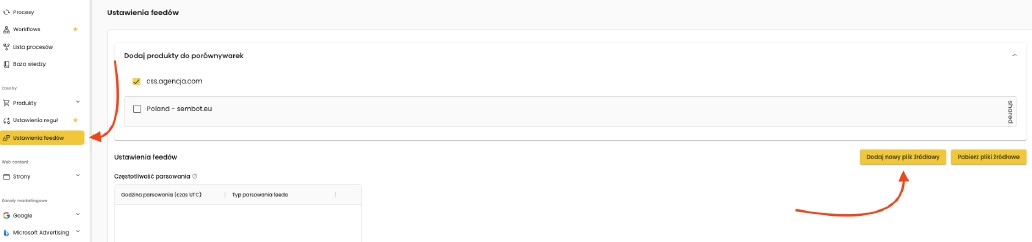
- In Sembot, go to the Feed Settings section in the left menu.
- Click Add new source file.
- Click Select connection source and choose the connection you added earlier.
- Select the appropriate Language.

- To map product IDs as the Google API does when connecting with GMC, enable the Use canonical product ID option.
- Then click Set mapping.
- Map the fields appropriately, paying attention to the Sample values on the right side.